Intro to Flavors and Environments
In this module, you’ll learn how to support multiple flavors and environments in your Flutter app.
But what are flavors and environments, and why do we need them?
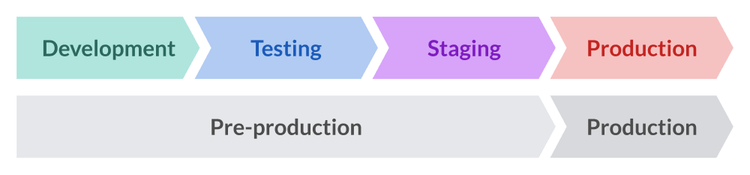
Let’s break it down by considering the stages of app development:
- Development: Code, test, repeat. You run the app directly from the IDE, using hot reload and the debugger to iterate quickly.
- Testing: Quality assurance, user acceptance testing, and bug fixes happen here. The app is distributed internally so stakeholders and beta testers can download and run it on their devices.
- Production: The app is live on the app stores, available to users.
All these stages are crucial to shipping a robust and high-quality app.
What Are Environments?
From an engineering perspective, it’s best practice to define separate environments so we can more easily isolate and test our software without impacting end users.
Depending on the organization and project complexity, it is common to have up to four different environments:
Each environment includes all the infrastructure needed to run the software in isolation. This may include:
- Auth, Database, Storage: Separate database instances prevent test data from mixing with production data.
- Analytics: Keep production analytics clean by isolating data in testing environments.
- Error Monitoring: Monitor crashes and errors per environment to avoid confusion.
- External Services: Use different API keys to ensure the app connects to the right backend for each environment.
For more on environments and their role within the deployment pipeline, check out the Firebase docs: Overview of environments.
What Are Flavors?
Environments are mainly related to backend infrastructure.
For the frontend, Flutter offers flavors, which are a way to build distinct versions of your app, each with different identifiers, API keys, assets, or even features.
Flavors are particularly useful on iOS and Android since they allow multiple versions of your app to be installed simultaneously, which is extremely valuable for QA and testing purposes.
Common use cases:
- Free vs. Paid: Publish different versions with distinct feature sets.
- Whitelabel: Create rebranded versions for multiple clients by customizing assets, theming, etc.
One Flavor per Environment
As discussed, each environment comprises multiple services such as a database, storage, analytics, etc.
But how does your Flutter app know which environment to use?
Flavors are the answer. By matching each flavor to the corresponding environment, you can ensure your app always connects to the correct services on the backend.
What things are Flavor-specific inside a Flutter app?
Here’s a list of flavor-specific things that we will explore in this course:
- App Icons and Launch Screens
- Analytics
- Error Monitoring
- Force Update Logic
- API keys for third-party services and backends
- Firebase Initialization
- CI Workflows
If your app needs any of these, it’s wise to set up flavors from the start. That’s why I decided to cover them early in the course.
Example: Multiple Environments
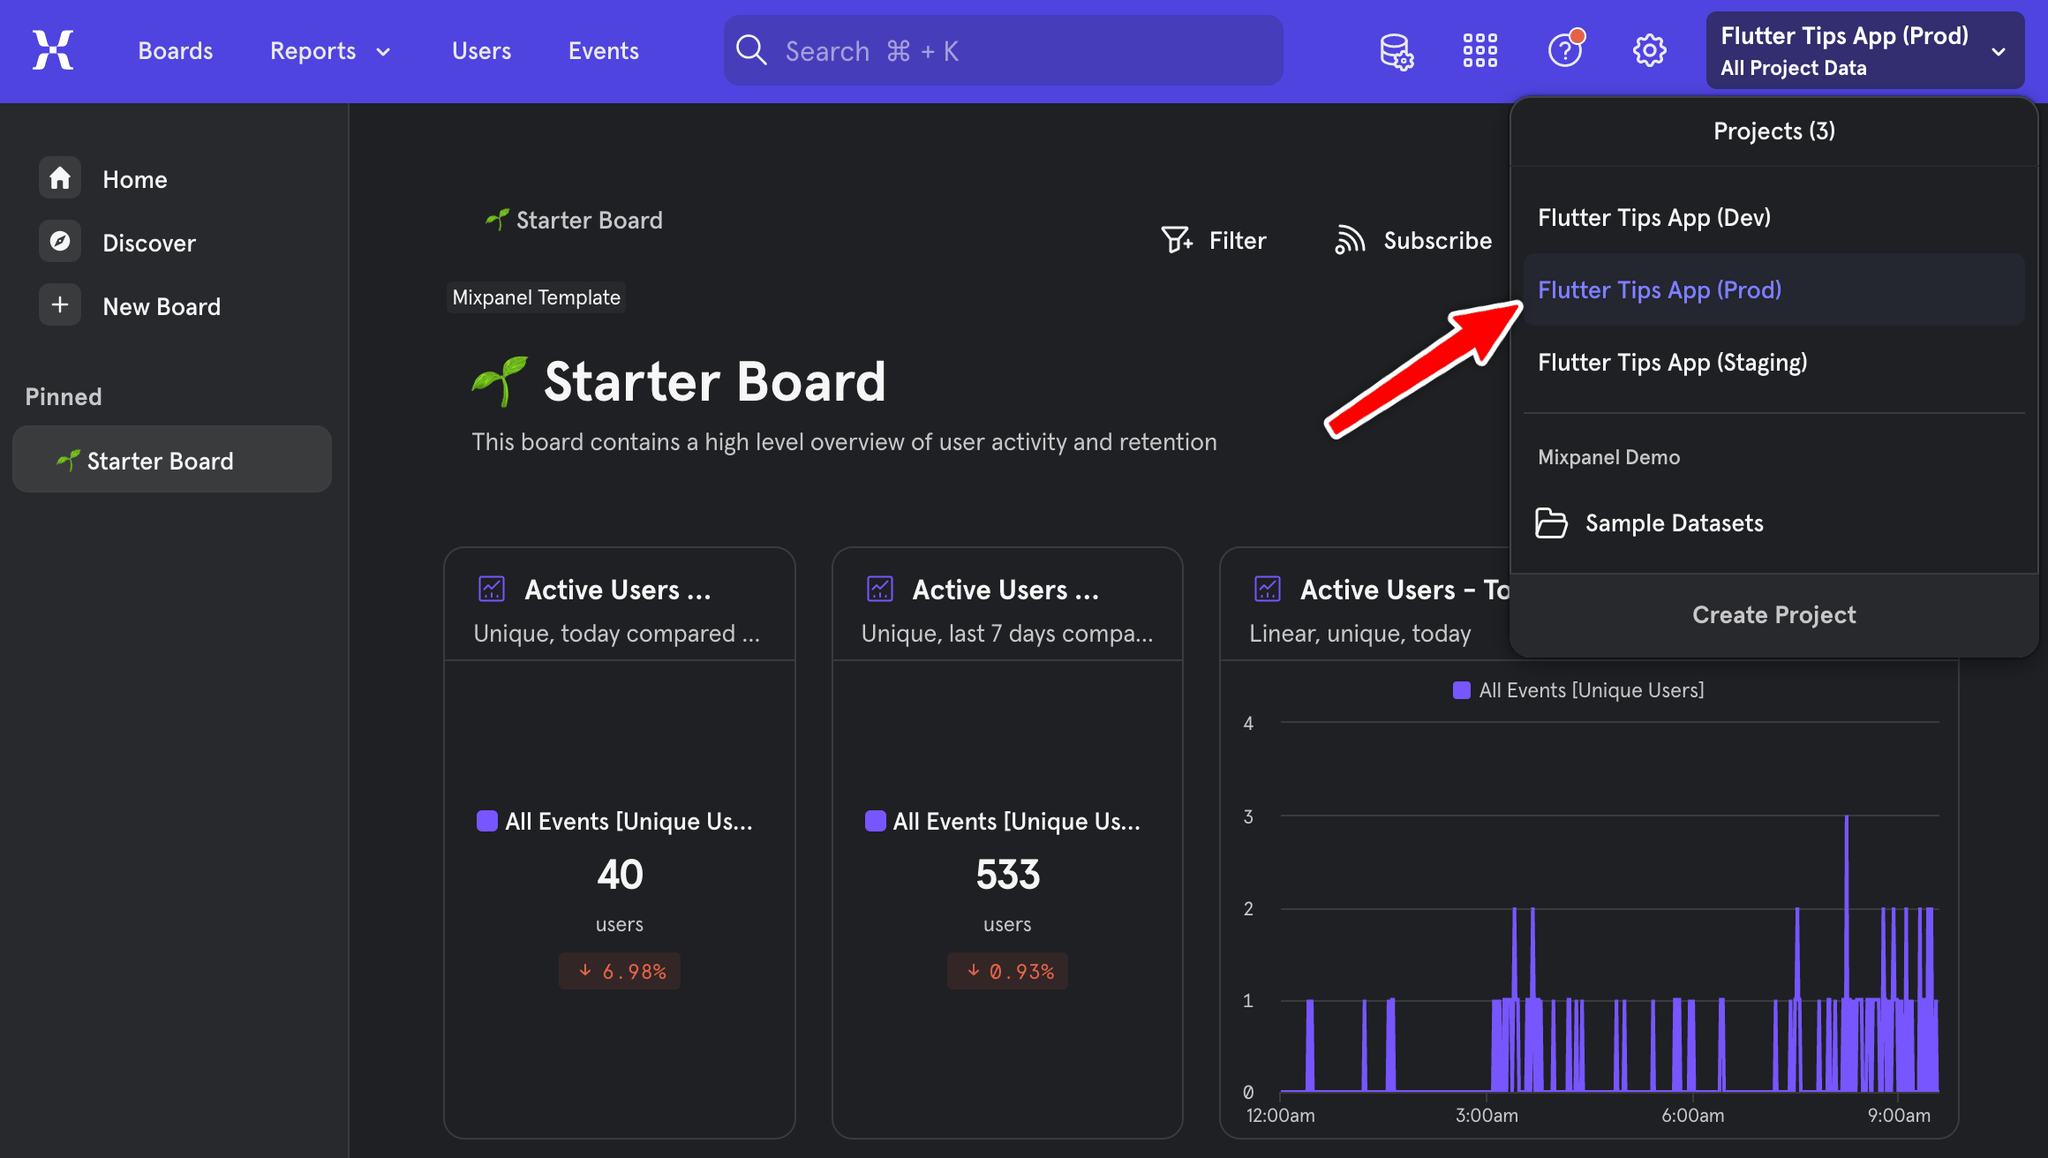
For instance, here’s the Mixpanel dashboard for my Flutter Tips app. Since this app has three flavors, I created three Mixpanel projects to ensure the analytics data doesn’t get mixed up:
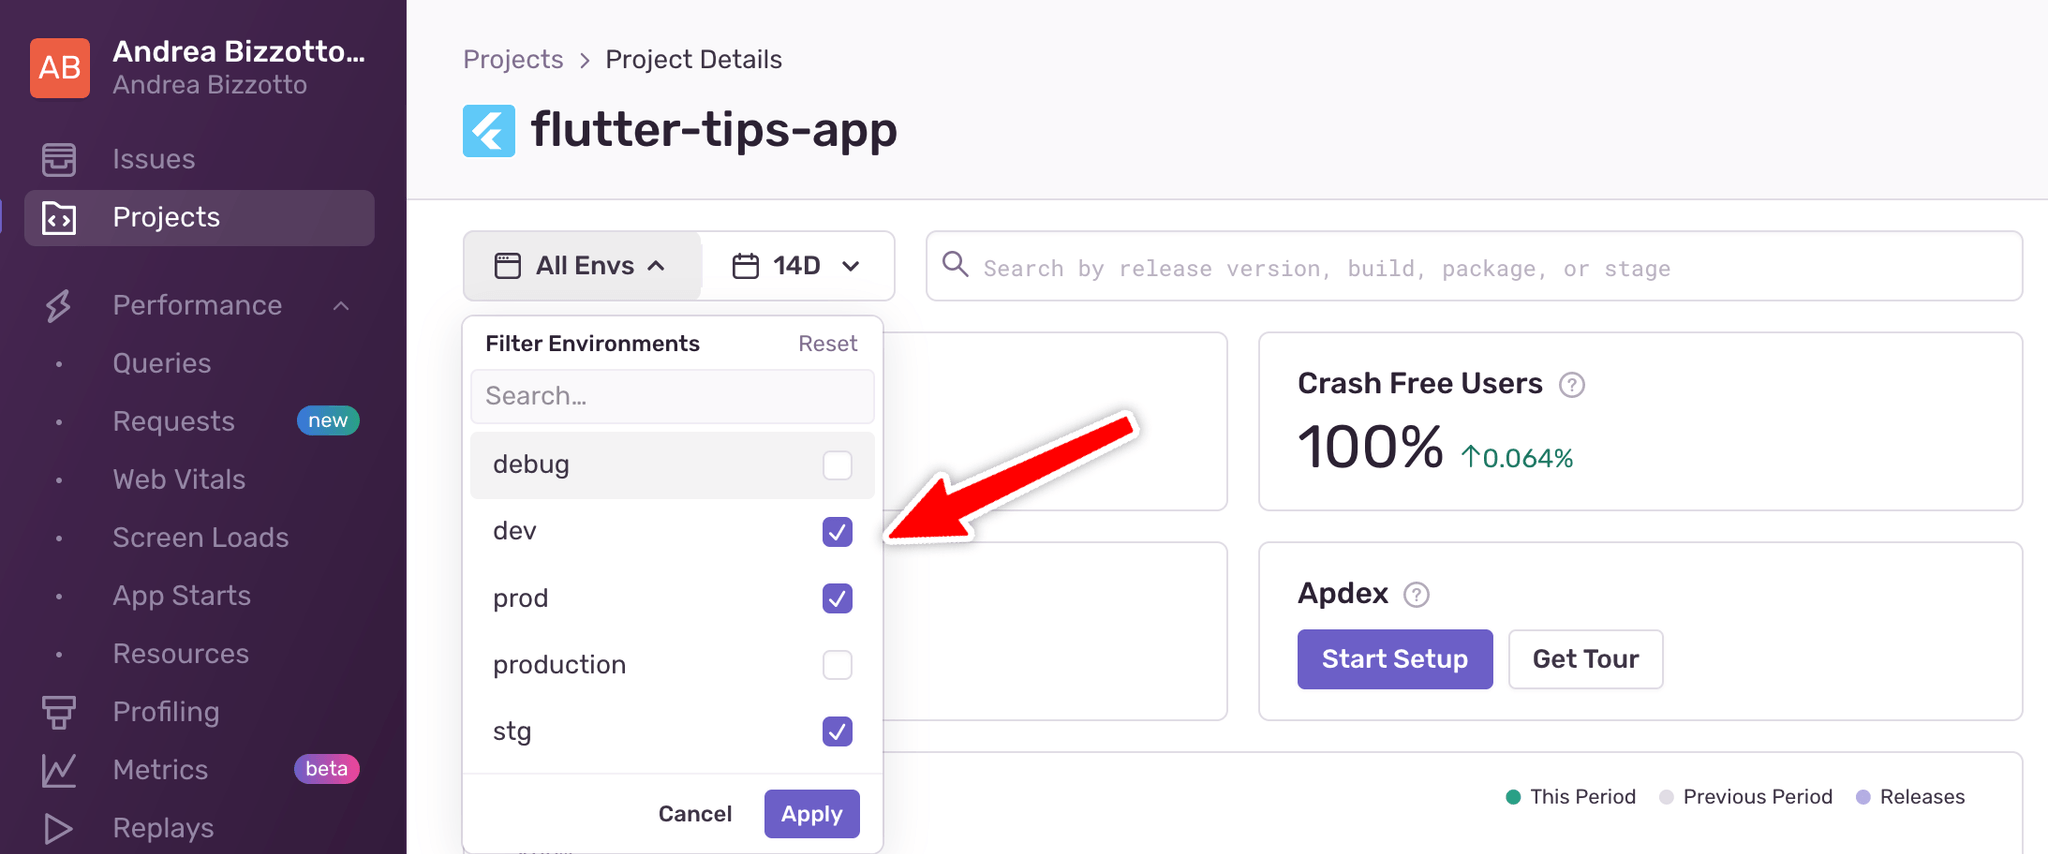
Likewise, here’s my Sentry dashboard. Sentry supports multiple environments, making it easy to filter issues by environment within a single project:
In what cases are flavors not needed?
You may not need flavors if your app:
- Doesn’t have any user-generated content that requires a remote database
- Doesn’t talk to any 3rd party APIs that require different API keys for testing and production
- Doesn’t use analytics or error monitoring, or if it does, you don’t care if the test and production events or logs get mixed
- Doesn’t have separate free and paid versions
- Doesn’t have any compile-time configurations and parameters that are read at runtime to customize your app’s behavior.
If that’s the case, you can skip this module altogether and move on to the rest of the course.
Common Flavors and Environment Setups
When setting up flavors and environments, the approach can vary based on your team size and the complexity of your app. Here’s a quick overview of common flavors and environments and their typical use cases:
- Development (dev): This is where developers work on the app. It’s often connected to a local or test backend, and it allows for fast iteration with debugging tools and hot reload.
- Staging (stg): This environment is often used to test the app in a near-production state. It mirrors production closely but uses test data. QA teams or stakeholders usually test the app here before it goes live.
- Production (prod): This is the live version of your app that end users interact with. It connects to the real backend and uses live data. Flavors for this environment should never be mixed with testing or development environments to avoid impacting real users.
How Teams Typically Approach Environment Setup:
- 1-2 Developers: Small projects often get by with just dev and prod environments. It’s simple and reduces overhead. Staging may not be needed unless the app is complex or has external stakeholders.
- Small Teams: Teams of 3-10 developers may introduce a staging environment for QA and user acceptance testing (UAT). They often need a safe space to test features before deploying to production.
- Large Teams or Corporations: Larger teams typically have multiple environments like dev, staging, testing, and production. They may even create additional environments like UAT or pre-production for various stages of testing and approval. This helps ensure that different teams (developers, testers, stakeholders) can work in parallel without affecting production.
When to Add More Environments:
- If you’re working solo or in a very small team, often dev and prod are enough. You can test new features locally and push them to production when ready.
- If you have separate teams for development and testing, or if stakeholders need to review changes before deployment, adding a staging environment makes sense. It creates a buffer between development and production, reducing the risk of bugs reaching users.
- For complex apps with multiple integrations (e.g., APIs, databases, analytics), having a staging environment is strongly recommended. It allows you to simulate production without affecting real users.
How to Add Flavors to a Flutter App
If you want to add flavors to a Flutter app, there are two techniques I recommend:
- Use flutter_flavorizr: This makes the process much quicker, but it works best on a new Flutter project since it works by modifying some specific project files with a specific folder structure.
- Add Flavors Manually: This is more time-consuming and error-prone, but it may be your only choice if you’re working on an existing project and need to retrofit flavors without breaking things.
We’ll cover both methods in detail so you can choose the best fit for your needs (or even mix and match them, depending on your requirements). I’ve also included a Flutter Flavors Checklist to guide you through the process. 👍
In this module, we’ll focus on the basic flavor setups for iOS and Android (including Firebase). We will tackle more flavor-specific concerns in the upcoming modules.
Why Use Flutter Flavorizr?
If you search pub.dev, you’ll find many packages you can use to set up flavors. Additional CLI tools, such as very_good_cli, can be used for the same purpose.
However, adding flavors is a multi-step process, and only flutter_flavorizr allows you to choose which steps to run with fine-grained control. That’s why we’ll be using it.
Benefits of Flavors and Environments
- Keep production and pre-production environments separate
- Develop and test your app without impacting real users
- Install multiple versions of your app on one device
- Work on whitelabel projects and/or support free and paid versions of your app
Time to test your knowledge by completing the quiz below!
Question 1 of 3You scored % ( out of 3)
Additional Resources
The official Flutter docs already have a basic guide on how to create flavors of a Flutter app. The upcoming lessons will cover all the steps in more detail.